CLICK HERE FOR FREE BLOGGER TEMPLATES, LINK BUTTONS AND MORE! »
Showing posts with label Home Decore. Show all posts

Wednesday, November 30, 2011

How I Decorate The Christmas Tree

Christmas is my favorite time of year.  I just love the beauty of it,  It is such a magical time.  I just can't help myself I put my tree up the week before Thanksgiving.  I am sure there are a few of you like me.  This blog post is about why I decorate my tree the way I do.   As a kid I just loved decorating the tree.  I waited with  anticipation for the day after Thanksgiving, the day we put up our tree.  The ornaments we used were all hand made by my sister and I.  We had so much fun finding the right branch to proudly display our ornaments. The tree never looked like it belonged on display in a department store but we thought it was beautiful.  I had a friend who's mom would never let her touch there tree. "How sad" I thought to myself. 
But as an adult with a passion for creating things and decorating I wanted my tree to look like it belonged in a department store.  I read all kinds of articles on decorating trees, I would plan how I wanted my tree to look weeks before Christmas.  When my kids would bring home a hand made ornament I would be so pleased, and then hang it on the back of the tree.  (Bad Mom) I know! 

But as I thought about this need to have the perfect tree I felt selfish.  Christmas is so much more for the kids then me. Besides, the time in a child's life when Christmas is the most magical is so short. I know that they will grow up to soon, and then I will have plenty of time to make my tree the envy of my friends.  My children will remember decorating the tree with me for the rest of their life, and I will become sentimental every time I pull out the ornament they made when they were in preschool. 

So my hand made ornament tree is displayed proudly with the paper stare my 8 year old made for the tree topper.


Evelyn felt she need to ware something more festive for the tree decorating so she changed.


Thursday, November 17, 2011

Burlap Wreath & Banner For Fall

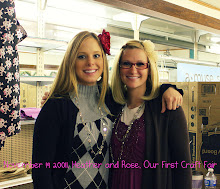
I have been absent from the blog for awhile now, my mind hasn't been on the blog at all. I have been cleaning the house, doing laundry, working full time (now) going through all our clothes, decorating the house for Thanksgiving, planning Christmas gifts, and working hard for our FIRST Craft Fair, we both have! Yes we are so excited, kind of scared but just can't wait till November 19th is here. Well in all this I have made a banner for my mantel. But first I would like to show you the wreath I have made. Its a burlap wreath but in a diamond / square shape. I got the idea for the wreath from Just Sew Sassy, here is the link to her Rolled Burlap and Rosette Wreath.


I did make felt flowers to go all around it, But I am happy with how it looks on our door. Maybe next year I will add more. Then I made the bow with glitter ribbon. Let me tell you, I love glitter, but when I dropped the ribbon on the floor. I have never seen so much glitter fall off a little spool! It was crazy. There is glitter all through the house right now. It is unstoppable.... When Rose came over the other day and we were working on our headbands. We had glitter everywhere. Now that Christmas is on its way there is bound to be even more.


For my banner, I took 12x12 brown scrap book paper and cut it into to four pieces and then took 12x12 leaf scarp book paper and cut four circles out of each piece. Then I found polka dot letters on the internet and print them off and colored them with crayons. I then glued each layer together and hole punched two holes in each letter and strung brown yarn through. I wanted to add more to the banner but I am not sure what I want to do. So next year when I hang it up again, I will make the choice, By the way this is one of my favorite sayings.   ~Harvest Blessing~


Now for the one little bloom on my Christmas Cactus to open. It has been growing for the past week and I am so anxious to see it! If you want a flower around Thanksgiving and Christmas, I say go for this one. This one is so pretty and unique to me. I am thinking about getting a couple more to have. They are easy to keep too, I am the worst when it comes to a house plant. 


Saturday, August 6, 2011

Tomatoe Garden on the Porch

Hi to you all, I had a wonderful time in Michigan with my family, we stayed with my in-laws, Tim and Linda whom I must say thank you for being so hospitable. They opened their home to us of a whole 5 weeks.  It was so refreshing, and now home seems a little closer.
Now I must share this wonderful idea Linda had.  She planted her tomatoes in large tubs and placed them on her deck.  First of all this is a good thing if you don't have the space for a garden or you don't want to tear up your yard for one, but this looked so pleasing too.  The plants added a wonderful ambiance to the porch, I will be doing this next year.   Everyone who came over commented on the great idea of planting your tomatoes in a pot.  If your try this just remember to drill a hole in the bottom of the pot so the soil can drain.


Friday, July 15, 2011

Gel Air Freshener


My mom is the crafting queen.  My childhood was filled with tons of creativity. My mom has more imagination in her little finger then most people have in their whole body.  Growing up we never threw away a cereal box, paper towel or toilet paper roll, anything with creative potential was saved.  I am so happy to see my mom has not missed a beat when it comes to her grand kids.   She has ideas saved up form newspaper articles, children's books, web sites, and from her memory.  I have enjoyed seeing all the neat things my kids make after spending the afternoon with "Mimie".

I had to share this one with you.  
As I will all the others in another post...
All you need is:
2 Envelopes unflavored Gelatin 
1tsp or more of some perfume or other fragrance
1/2 cup hot water
1/2 cup ice cold water
Food coloring 
A small jar like a jelly or baby food jar

Mix the gelatin and hot water in a bowl until the gelatin in dissolved. Stir in Fragrance and food coloring, then the ice water. let set in a cool place. ( do not put it in the frige)  


This smelled so good. You could cover it with some pretty fabric and tie it with a ribbon and it would be a nice gift your kids could make for family at Christmas.


Wednesday, July 13, 2011

Make your own Chalkboard!

I have had this project sitting around, and finally got around to finishing it, what  a simple and fun craft. You can do this with your kids!

All you need is:
Chalkboard Paint
Foam Paintbrush
Paint Tape
An item that you want to turn into a chalkboard
....and of course Chalk for when its done:)

First, start by taking your item to paint and marking off with the paint tape. I used a platter that matches all my dishes, I have two of them. So I went ahead and decided why not have a chalkboard that matches.


Second, start painting the chalkboard paint onto the surface. You will want to do two coats, but let your first coat sit over night. Or just most of the day.


Third, you will take the tape off after its completely dry, now you have a chalkboard! Start writing away. I added decor around mine. I have a chicken and rooster kitchen so I added some fabric rolled flowers to match as well.


One day soon, we will do a Tutorial on How to make rolled fabric flowers!


(I am going to find an easel to put my chalkboard on, just haven't found one I like yet.)

Enjoy!


Related Posts Plugin for WordPress, Blogger...

Popular Posts