


Heather and I (Rose) have singed up for Stash Busting September. It seem like a good idea. The goal is not to buy any craft supplies and make crafts with the stuff you have stashed away. It is harder than you think not to buy any thing for crafts, especially during the most fun fall months. I am glad I stocked up for Halloween in the summer. I bought a bunch of fabric mesh back in July, so with a friend, Amie, we had a craft day. The tutorial on how to make a fabric mesh wreath is below. Since I am short on time and my little one, Georgia, is needing me I'll stop writing and let you look at the pictures.


What you need is...
1: Role of metallic mesh fabric. 21 in. X 10 yds.
1: Role Mesh Ribbon
1: Box of 100 white lights
1: package of 50 or more Fern Pins (Floral Pins)
1: 14 in. wide white foam wreath.

Take the raw edge of the Fabric fold the edge under and bunch it up in you hand and wrap it around the outside of the foam wreath. Push the pins into the fabric and foam holding the fabric to the wreath.


Now take about 16 inches or more (use your judgement on how much fabric to use) of the fabric and push it up to the pined edge to make a loop. Gather the fabric at the end of the loop and pin it to the wreath. Leave the open ends of loop because you will feed the lights threw them.

Continue making loops with the fabric and pinning. Place each loop of fabric as close to the other as you can so the wreath will look full.

The next step is to put the lights in the wreath. You will start threading the lights at the back of your wreath. Take and stretch the lights out so they are not too stiff. Start at one end and make a loop with the lights and push the loop of lights threw one of the fabric loops. (you can see how I did it below.)

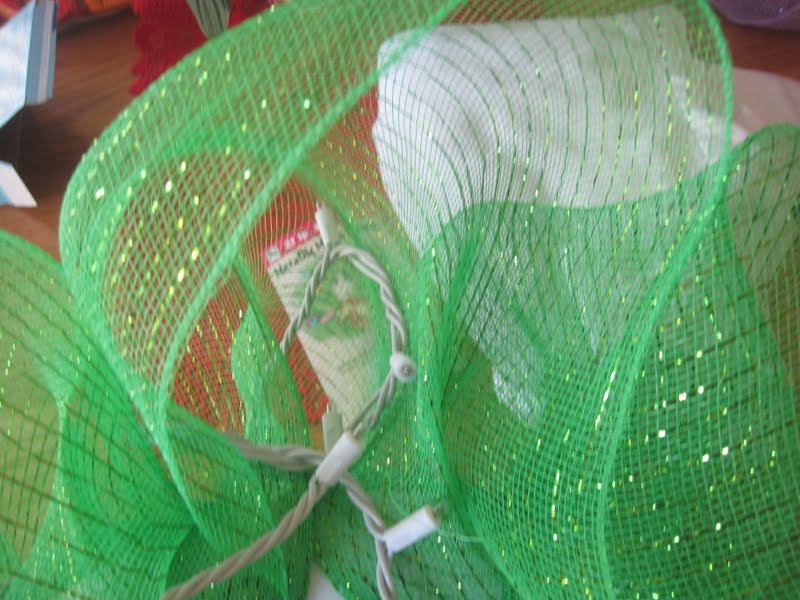

Take a pin, grab some fabric along with the lights cord and push it into the foam wreath. Use a as many pins as you feel you need to secure the lights. (I did not feel like I need too many) You will have the rest of the lights hang out the back of the wreath, take an make another loop with the lights and push them threw the next loop of fabric continue until you are done. Now if you need to pin any fabric to shape the wreath go ahead and do that.

I made a Bow and pined it to the wreath And that was it.
Done, But if you like you can add any decorations to the wreath you like. Make a holiday theme. Have fun with your creative juices.


How adorable is this?! And isn't it so much more fun to craft with other people! Great job! I hope to see this at my party--
ReplyDeletehttp://southernlovely.blogspot.com/2011/09/show-share-5.html
Ooooo... That's so pretty! looks like it was fun to make too
ReplyDeleteThat is so creative!
ReplyDeleteI love this!!
ReplyDeleteThese are so fun!! Thanks for sharing :)
ReplyDeleteYOUR featured!!! Come see! ;) http://trulylovelywiththelaneysisters.blogspot.com/2011/09/fancy-this-features-42.html
ReplyDeleteWe are saving for a trip so all of my crafts I have been trying to use supplies on hand. You all did a great job, looks like a fun time. Thanks for sharing at Bacon Time.
ReplyDeleteThank you so much for linking up your project to our What I Made Wednesday Party! Your project was the most popular and you have won FREE advertising on our blog for the next week!
ReplyDeleteCome and join us tomorrow for a new party & grab a button!
Alisa
Sweet Peas and Bumblebees